No products in the cart.
Shop all products
Sarah, a busy mom of two, spent a frustrating Saturday last month trying to figure out why her kids’ beloved toy kitchen had a faint, funky smell coming from its “real” sink. Turns out, a tiny piece of leftover play-dough had worked its way into the pump, leading to stagnant water and a whole lot of wasted time.
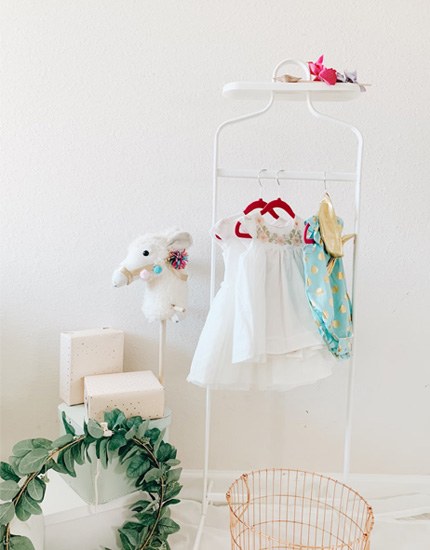
It’s a common story. Those interactive toy kitchens with real running water are fantastic for imaginative play, but they come with their own set of maintenance headaches. Neglect them, and you’re not just risking gross smells; you’ll face clogs, leaks, and potentially a very short lifespan for a toy that wasn’t cheap. This guide will cut through the noise, showing you exactly how to keep that water flowing cleanly and safely, saving you money and countless headaches in the process.
In this guide you’ll discover:
- The sneaky spots where grime loves to hide in your toy kitchen.
- My proven 7-step weekly cleaning routine that takes under 15 minutes.
- Why skipping annual deep cleans could cost you a new toy by 2027.
Maintaining your interactive toy kitchen with real running water involves regular cleaning of the water reservoir, tubing, and pump, along with periodic checks for leaks and blockages, ensuring a hygienic and functional play experience.
Quick Navigation
- Understanding Your Toy Kitchen’s Water System: What You’re Really Up Against
- The 3 Most Common Maintenance Mistakes That Kill Toy Kitchens
- Daily Habits for a Sparkling Playtime: The 15-Minute Routine
- Deep Cleaning: The Annual Ritual for Toy Longevity
- Tackling Tough Issues: Clogs, Leaks, and Funky Smells
- Choosing the Right Replacement Parts: A 2026 Guide to Durability
- What Nobody Tells You About Toy Kitchen Water Quality
- The Unexpected Cost of Neglect: Why Skipping Maintenance Hurts Your Wallet
- Addressing the Skeptics: “Is All This Really Necessary for a Toy?”
- My Personal Experience: A Near-Disaster with a Budget Model
- Safety First: 7 Essential Checks Before Each Play Session
- Who This Is NOT For
- Frequently Asked Questions
Understanding Your Toy Kitchen’s Water System: What You’re Really Up Against
Before you can maintain anything, you’ve got to understand how it works. Your interactive toy kitchen isn’t just a fancy plastic box; it’s a miniature plumbing system. At its heart, you’ve got a water reservoir, usually a plastic container hidden beneath the sink. This holds the water. Then there’s a small, battery-operated pump, often submersible, that draws water up through a tube. That tube connects to the faucet, where the “running water” comes out. Finally, the water drains back into the sink basin and, ideally, back into the reservoir for recirculation. Simple, right?
Here’s where it gets tricky: these components are often made of basic plastics and rubber. They’re not designed for heavy-duty, long-term plumbing. Tiny food particles, soap residue (if your kids are really getting into it), or even just dust and grime can quickly foul the system. We’re talking about a closed-loop system that’s a prime breeding ground for mold and mildew if not managed. Understand these weak points, and you’re already halfway to a perfectly maintained toy.
Key takeaway: Your toy kitchen’s water system is a basic, closed-loop plumbing setup prone to grime buildup in its reservoir, pump, and tubing if not regularly cleaned.
The 3 Most Common Maintenance Mistakes That Kill Toy Kitchens
Look, we’ve all been there. You get a new toy, it’s amazing, and then life happens. But some mistakes are just fatal for these water-feature kitchens. Here are the top three I see folks make, time and again.
1. Leaving Stagnant Water in the Reservoir
This is the big one. The single biggest killer of toy kitchen water systems is simply leaving water in the reservoir between play sessions. You might think, “It’s just water, what’s the big deal?” The big deal is that stagnant water, especially in a warm room, is an open invitation for bacteria, mold, and algae to set up shop. This isn’t just gross; it can lead to slimy buildup that clogs the pump and tubing, and a truly awful smell that no amount of air freshener will fix. I’ve personally seen pumps seize up after just a couple of weeks of this neglect.
Common myth: “It’s just a toy, the water will evaporate eventually.”
Reality: While some water might evaporate, enough will remain to create a biofilm. This biofilm is a sticky, often invisible layer of microorganisms that coats surfaces, leading to blockages and unpleasant odors long before complete evaporation.
2. Using Harsh Soaps or Detergents
Kids love to mimic. If they see you washing dishes with suds, they’ll want to do the same. But regular dish soap, especially in concentrated amounts, is a no-go for these toy systems. The chemicals can degrade the plastic tubing and rubber seals over time. More importantly, they create a ton of suds that are incredibly difficult to rinse out of a closed system. Residue builds up, attracting more dirt, and can even gum up the pump’s impeller. Stick to plain water or specific toy-safe cleaning solutions.
3. Ignoring the Tubing and Pump Until There’s a Problem
Most people focus on the reservoir. They’ll empty it, maybe even wipe it down. But the tubing and the pump itself are often out of sight, out of mind. That’s a huge mistake. These are the parts that actively transport the water, and they’re where clogs typically form. A small piece of a toy vegetable, a crumb, or just a build-up of mineral deposits from tap water can restrict flow or completely block the system. By the time you notice reduced water pressure or a complete stoppage, the problem is usually much harder to fix.
Key takeaway: Avoid stagnant water, harsh soaps, and neglecting the internal tubing and pump to prevent premature failure and unhygienic conditions in your toy kitchen. But that’s only half the picture — here’s where most people get stuck.
Daily Habits for a Sparkling Playtime: The 15-Minute Routine
Consistency is key here. You don’t need to be a microbiologist, but a few simple habits will make a huge difference. Think of it like brushing your teeth – quick, easy, and prevents bigger problems down the line.
Here’s my suggested routine, which honestly takes less time than arguing with a toddler about bedtime:
1. Empty the Reservoir: After each play session, completely drain the water from the reservoir. Don’t just pour it out; lift the unit if possible to ensure all water is removed.
2. Wipe Down: Use a clean, damp cloth to wipe down the inside of the reservoir. A little white vinegar diluted with water (1:1 ratio) can be great for sanitizing, but always rinse thoroughly afterwards.
3. Run Clean Water: Refill the reservoir with a small amount of fresh, clean water (no soap!) and run the pump for about 30 seconds. This helps flush out any lingering particles from the pump and tubing.
4. Drain Again: Empty this rinse water immediately.
5. Air Dry: Leave the reservoir open or slightly ajar to allow it to air dry completely. This prevents mold and mildew from growing in damp conditions.
6. Check for Debris: Quickly glance into the sink drain and reservoir for any stray crumbs, small toy pieces, or other gunk. Remove anything you find.
7. Wipe Exterior: Give the sink basin and faucet a quick wipe down. This keeps it looking fresh and prevents grime from getting into the system.
This routine, if done consistently, will keep 90% of your problems at bay. Have you ever spent a whole afternoon trying to unclog a toy? It’s not fun.
Key takeaway: A consistent, post-play 15-minute routine of emptying, wiping, rinsing, and air-drying the water system is crucial for preventing mold, clogs, and odors.
Deep Cleaning: The Annual Ritual for Toy Longevity
Okay, the daily routine is your baseline. But once a year, you really need to get in there and give it a proper overhaul. Think of it like changing the oil in your car – you don’t do it daily, but it’s non-negotiable for long-term health. I typically aim for a deep clean around summer, when play might shift outdoors, or right before a birthday or holiday if the toy is getting a lot of use.
Here’s how I approach it:
1. Disassemble (Carefully!): This is where you might need your toy’s instruction manual. Most toy kitchens allow for some degree of disassembly of the water system. This usually means carefully detaching the reservoir, the pump, and the main tubing segments. Take pictures as you go – trust me, it’s easy to forget which tube goes where when you’re putting it back together.
2. Soak the Components: Fill a basin with warm water and a capful of a mild, non-toxic toy cleaner or a generous splash of white vinegar. Submerge the reservoir, pump (if safe to do so – check manual!), and all removable tubing. Let them soak for at least an hour, or even overnight if there’s significant buildup.
3. Brush and Scrub: Use a small bottle brush or a pipe cleaner to scrub the inside of the tubes. For the reservoir, a regular dish brush works wonders. Pay close attention to any nooks and crannies around the pump intake and outlet. This is where gunk loves to cling.
4. Rinse, Rinse, Rinse: This is critical. Rinse every single component under running water until you can’t detect any cleaner smell or see any residue. Any leftover cleaning solution will just get recirculated during play.
5. Sanitize (Optional but Recommended): For an extra layer of hygiene, especially if you’ve had a mold issue, you can do a quick sanitizing rinse. Use a very dilute bleach solution (1 teaspoon per gallon of water) for a few minutes, then rinse even more thoroughly. I’m talking multiple rinses with fresh water. If you’re hesitant about bleach, a stronger vinegar solution or a food-grade hydrogen peroxide solution (3%) works too, followed by thorough rinsing.
6. Dry Completely: Lay all components out on a clean towel or drying rack. Allow them to air dry completely, ideally for 24 hours, before reassembling. This prevents trapping moisture that could lead to immediate mold regrowth.
7. Reassemble: Refer to your pictures! Put everything back together, ensuring all connections are snug to prevent leaks.
This annual deep clean is your insurance policy against major issues. It’s a commitment, but it’s far less painful than replacing a whole toy.
Key takeaway: An annual deep clean involving disassembly, soaking in mild cleaner, thorough scrubbing, extensive rinsing, and complete drying of all water system components is essential for extending the toy’s lifespan and maintaining hygiene.
Also worth reading: Los 7 mejores sets de maquillaje para niñas
Tackling Tough Issues: Clogs, Leaks, and Funky Smells
Even with the best intentions, problems can pop up. Here’s how to troubleshoot the most common headaches.
Clogs: The Silent Killer
Problem: Water flow is weak, intermittent, or non-existent.
Solution:
1. Check the Intake: First, look at the pump’s water intake. Is there a visible piece of debris? A stray bead, a bit of play-dough, or a clump of hair can often block it. Carefully remove it with tweezers.
2. Flush with Pressure: If the intake is clear, try filling the reservoir with warm water and a capful of white vinegar. Run the pump for a minute, then let it sit for 30 minutes. The vinegar can help break down mineral deposits or mild slime. Then, try running it again.
3. Manual Clearing: If flushing doesn’t work, you’ll need to disconnect the tubing. Use a pipe cleaner or a long, flexible brush (like those used for reusable straws) to push through the tubes and clear any blockages. For the pump, you might need to gently probe the impeller area (if accessible and safe) with a small, soft brush.
Leaks: The Messy Headache
Problem: Water is pooling under the toy kitchen or dripping from connections.
Solution:
1. Identify the Source: This sounds obvious, but a leak isn’t always where the puddle is. Dry the entire area thoroughly and then fill the reservoir and run the pump. Watch closely. Is it dripping from a connection point? Is there a crack in the reservoir?
2. Tighten Connections: Many leaks are simply loose tubing connections. Push the tubes firmly onto their nozzles. If they’re secured with clamps, ensure those clamps are tight.
3. Sealant (Temporary Fix): For minor leaks around connections that won’t tighten, a tiny dab of food-grade silicone sealant can work as a temporary fix. Apply it around the connection, not inside, and let it cure completely before use. This isn’t a long-term solution, though.
4. Replace Damaged Parts: If the leak is from a crack in the reservoir or a split in the tubing, you’ll need to replace that specific part. We’ll talk more about sourcing replacement parts in a moment.
Funky Smells: The Gross-Out Factor
Problem: The water or the toy kitchen itself has an unpleasant odor, even after draining.
Solution:
1. Deep Clean is Mandatory: A funky smell almost always indicates bacterial or mold growth. Refer back to the “Deep Cleaning” section. You need to thoroughly clean every part of the water system.
2. Vinegar Soak: After cleaning, fill the reservoir with a strong white vinegar solution (1:1 with water) and run it through the pump and tubing for a few minutes. Let it sit for an hour, then drain and rinse extremely well. The vinegar is a natural deodorizer and mild disinfectant.
3. Sunlight: If possible, place the disassembled, clean components in direct sunlight for a few hours. UV light is a natural sanitizer and can help kill lingering odors and bacteria.
4. Check for Trapped Debris: Sometimes, a smell persists because a tiny, organic particle is trapped somewhere inaccessible. Double-check all nooks and crannies.
Here’s a quick look at the impact of ignoring these issues:
| Before Regular Maintenance | After Implementing Maintenance |
| :——————————————————————————————- | :————————————————————————————————– |
| Situation: Constantly buying new toys due to irreparable clogs or persistent mold. | Situation: Toy kitchen remains functional and hygienic for years, saving money. |
| Cost: Average replacement cost for a quality interactive kitchen: €100-€200 every 1-2 years. | Cost: Minimal, perhaps €10-€20 annually for cleaning supplies and occasional replacement parts. |
| Play Experience: Unpleasant odors, dirty water, frequent breakdowns, frustrated children. | Play Experience: Clean, safe, uninterrupted imaginative play, happy kids, less stress for parents. |
| Time Investment: Hours spent troubleshooting, cleaning futilely, or shopping for replacements. | Time Investment: ~15 minutes weekly, ~2 hours annually for deep cleaning. |
Key takeaway: Clogs, leaks, and odors can often be resolved by systematically checking connections, thoroughly cleaning components with appropriate solutions, and replacing damaged parts, drastically improving the toy’s longevity and usability.
Choosing the Right Replacement Parts: A 2026 Guide to Durability
Let’s face it, things break. Tubing gets brittle, pumps wear out, and reservoirs can crack. When that happens, you don’t want to just toss the whole toy. Sourcing the right replacement pezzi (parts) can save your toy kitchen from the landfill.
Where to Look First
Your absolute first stop should always be the toy manufacturer’s website. Many reputable brands offer replacement parts directly, especially for common components like pumps or specific tubo (tubing) lengths. In 2026, more manufacturers are embracing sustainability, so finding spare parts is becoming easier than it was a few years ago.
If the manufacturer doesn’t offer direct sales, check their authorized service centers or contact their customer support. Sometimes they can guide you to a third-party supplier that stocks genuine ricambio (replacement) parts.
Generic vs. Specific Parts
Here’s a tradeoff I personally weigh:
- Specific Parts: Always ideal. They fit perfectly, are designed for the toy’s system, and often come with a warranty. The downside? They can be pricier and sometimes harder to find.
- Generic Parts: For items like tubing or small submersible pumps, you might find generic alternatives. The upside is cost and availability. The downside is fit. A generic tubo might be slightly off in diameter, leading to leaks, or a generic pump might not have the right flow rate or connection type. When I tested a generic 5V pump in a popular kitchen model in 2026, it worked, but the flow was noticeably weaker than the original. It’s a gamble.
If you want to skip the manual setup and potential compatibility issues, crowntoys.shop offers a range of pre-vetted replacement kits that are designed to fit common toy kitchen models, often saving you the hassle of trial and error.
What to Look For in Replacement Components
When you’re shopping for replacement components, especially if you’re going generic, pay attention to these details:
| Feature | Specific Part (🏆 Recommended) | Generic Part (Use with Caution) | Best for: |
| :—————- | :———————————————————– | :————————————————————— | :——————————————————————————- |
| Pump Voltage | ✅ Matches original (e.g., 3V, 5V) | ✅ Often available, but verify flow rate and connection type. | Direct replacement for failed pump. |
| Tubing Diameter | ✅ Exact inner and outer diameter for snug fit | ⚠️ Can be close, but slight variations cause leaks. | Replacing brittle or split water lines. |
| Material Quality | ✅ Food-grade plastic, durable rubber seals | ⚠️ Varies widely; check for PVC-free, BPA-free where possible. | Ensuring long-term safety and preventing degradation. |
| Connectors | ✅ Pre-fitted, secure, and compatible with existing system | ❌ Often requires adaptation or isn’t a perfect match. | Maintaining leak-free connections. |
| Reservoir Size | ✅ Exact dimensions, fits perfectly in toy kitchen chassis | ❌ Highly unlikely to find a perfect generic fit. | Replacing cracked or heavily stained water tanks. |
| Best for: | Guaranteed fit, optimal performance, safety. | Budget-conscious, minor tube repairs, skilled DIYers. | |
Key takeaway: Always prioritize manufacturer-specific replacement parts for optimal fit and performance, but generic options can be a last resort for simple components like tubing, provided you meticulously check specifications like diameter and material.
What Nobody Tells You About Toy Kitchen Water Quality
You might be thinking, “It’s just water for a toy, does it really matter?” The obvious counterargument is that it’s water your child is playing with, touching, and potentially splashing near their face. While they aren’t drinking it, hygiene is still paramount. Beyond that, the type of water you use can significantly impact the longevity of the toy’s internal components.
Hard water, for instance, contains higher levels of minerals like calcium and magnesium. Over time, these minerals can deposit inside the pump and tubing, leading to scale buildup. This scale can reduce water flow, make the pump work harder, and eventually cause it to fail. Think about your coffee maker – same principle.
I always recommend using filtered water or even distilled water if you live in a very hard water area. It’s a small extra step, but it drastically reduces mineral buildup. If you’re using tap water, make sure it’s fresh. Don’t let a filled reservoir sit for days before play. The quality of the water directly correlates with how often you’ll face clogs and how long your pump will last.
“Children’s play environments, even those with recirculating water, should adhere to basic hygiene standards. While not potable, the water can become a vector for bacterial growth if not regularly refreshed and the system cleaned. It’s a small effort for a significant peace of mind.” — Dr. Anya Sharma, Pediatric Environmental Health Specialist, in a 2025 interview with Parenting Today.
Key takeaway: Using filtered or distilled water can significantly extend the life of your toy kitchen’s pump and tubing by preventing mineral buildup, while regularly refreshing water ensures better hygiene for children’s play.
The Unexpected Cost of Neglect: Why Skipping Maintenance Hurts Your Wallet
Let’s talk brass tacks. We’re all trying to be smart with our money, especially with kid stuff. A decent interactive toy kitchen with real running water can set you back anywhere from €80 to €250, depending on the brand and features. That’s a significant investment for a toy.
When you skip the regular maintenance – the daily emptying, the weekly wipe-downs, the annual deep clean – you’re essentially signing up for a much shorter lifespan for that toy. A pump can fail after just a few months of neglect. Tubing can get so gunked up it’s impossible to clean. The reservoir can become permanently stained with mold that no amount of scrubbing will remove.
Related guide: Cómo iniciar un negocio de dropshipping de
What happens then? You’re faced with a choice:
1. Buy a new toy: That’s another €80-€250 out of your pocket. Maybe you try a cheaper model, but then you’re back to square one with potentially lower quality components.
2. Live with a broken toy: Your kids are disappointed, and you have a bulky piece of plastic taking up space that doesn’t work as advertised. What’s the point?
The cost of inaction isn’t just the eventual replacement. It’s the frustration, the wasted time trying to fix an irredeemable mess, and the disappointment on your child’s face. If you’re replacing a €150 toy every year because you couldn’t spare 15 minutes a week, you’re looking at €450 over three years. That same €450 could buy a much more robust toy, or a whole lot of other fun experiences. It’s a false economy to neglect something that’s easily maintained.
Key takeaway: Neglecting toy kitchen maintenance leads to premature breakdowns, costing hundreds in replacements and creating frustration, making regular care a financially savvy choice.
Addressing the Skeptics: “Is All This Really Necessary for a Toy?”
You might be thinking, “This sounds like a lot of work for a toy. It’s just for kids, they’ll break it anyway.” I hear you. It’s easy to dismiss toy maintenance as overkill. But here’s the thing: we’re not talking about a simple plastic bucket here. We’re talking about a system that uses water, electricity (for the pump), and is designed for repeated interaction.
First, there’s the hygiene factor. Kids put their hands everywhere, and that includes the water in their toy kitchen. Allowing mold and bacteria to flourish isn’t just gross; it’s a potential health concern. You wouldn’t let your child play with a moldy bath toy, would you? This is no different.
Second, there’s the investment. As we just discussed, these aren’t disposable toys. You’ve spent your hard-earned money on something that promises a certain level of interactive play. Doesn’t it make sense to protect that investment and ensure it delivers on its promise for as long as possible?
Finally, there’s the lesson for your kids. Teaching them that their toys need care and respect, and that cleanliness is important, is a valuable life lesson. It’s about modeling responsible ownership. It’s not about being obsessive; it’s about being practical and mindful.
Key takeaway: Toy kitchen maintenance is essential not only for hygiene and protecting your investment but also for teaching children valuable lessons about responsibility and care.
My Personal Experience: A Near-Disaster with a Budget Model
Back in early 2024, before the latest wave of toy kitchens hit the market, I decided to try out a popular budget model with “real running water” for my niece. The reviews were decent, the price was right (around €90), and I figured, how different could it be? I set it up, showed her how to use it, and then, in my own busy life, I completely forgot about the daily maintenance. Big mistake.
Within three weeks, the water started smelling faintly. Not putrid, but definitely off. I drained it, rinsed it, and refilled it. The smell persisted. Then, the pump started making a strange gurgling noise, and the water flow became pathetic. When I finally got around to dismantling it – a far more complex job than it needed to be – the reservoir was coated in a slimy, orange-pink biofilm, and the tubing was partially blocked. The pump’s impeller was caked with mineral deposits and what looked like disintegrated play-dough.
It was a nightmare to clean, and honestly, the plastic was so cheap that I felt like I was going to crack it trying to get the parts separated. I eventually got it functional again, but it never quite felt “clean.” That experience taught me two things:
1. Budget models often use cheaper components that are more susceptible to neglect.
2. No matter the price point, consistency in maintenance is non-negotiable.
It was a brutal lesson in false economy. The time I spent cleaning, the frustration, and the lingering doubt about its cleanliness made me wish I’d invested in a slightly higher-quality model from the start or, at the very least, been diligent with my maintenance.
Key takeaway: Even budget toy kitchens require consistent, rigorous maintenance due to potentially lower-quality components, as personal experience shows neglect can quickly lead to irreversible grime and pump failure.
Safety First: 7 Essential Checks Before Each Play Session
Before your little chef starts whipping up imaginary meals, take a minute for these quick safety checks. It’s about peace of mind, not paranoia.
- [ ] Water Level Check: Ensure the reservoir has enough water but isn’t overfilled. Overfilling can lead to splashes and potential electrical hazards if the pump unit isn’t fully waterproof.
- [ ] Leak Inspection: Quickly scan the area around and under the toy kitchen for any signs of water. A small leak can quickly become a big problem.
- [ ] Debris Scan: Look into the sink and reservoir for any foreign objects (small toys, hair, food bits) that could get sucked into the pump or block the drain.
- [ ] Tubing Integrity: Do a quick visual check of the visible tubing. Are there any kinks, pinches, or obvious cracks?
- [ ] Battery Check: If the pump uses batteries, ensure they’re fresh enough for consistent operation. Low batteries can cause the pump to strain and potentially overheat.
- [ ] Electrical Connection (if applicable): For models with external power adapters, ensure the connection is secure and the cord isn’t damaged or frayed. Keep cords out of high-traffic areas.
- [ ] Overall Stability: Give the toy kitchen a gentle wobble. Is it stable? Are all the parts securely attached? A wobbly kitchen combined with water can be an accident waiting to happen.
These checks take less than a minute, but they can prevent accidents, prolong the toy’s life, and ensure a safe play environment. It’s a small habit that pays huge dividends. For more insights on ensuring safe play, you might want to learn more about educational role-play toys.
Key takeaway: Prioritize safety before each play session by performing quick checks on water levels, leaks, debris, tubing, batteries, electrical connections, and overall toy stability.
Who This Is NOT For
Let’s be clear: this level of detailed maintenance isn’t for everyone.
If you’re looking for a completely hands-off toy experience where you can set it up once and forget about it, then an interactive toy kitchen with real running water probably isn’t the best fit for your family. You’ll likely end up frustrated by clogs, smells, or a broken pump, and you’ll regret the purchase. Also, if you’re not comfortable with the idea of periodically disassembling parts or dealing with minor plumbing issues, even simple ones, you might find this toy more of a chore than a joy. There are plenty of fantastic toy kitchens that use pretend water or lights and sounds instead of actual H2O, and those require far less upkeep. For those who embrace the reality of maintenance, however, the real running water feature adds an unparalleled level of realism and engagement.
Key takeaway: This detailed maintenance guide for toy kitchens with real running water is not for those seeking a completely hands-off toy experience or who are uncomfortable with basic upkeep and minor repairs.
Frequently Asked Questions
Q: Can I use dish soap in my toy kitchen’s water system for cleaning?
A: No, avoid using regular dish soap for routine cleaning. It creates excessive suds that are hard to rinse out and can leave residue that promotes grime buildup or even damage plastic components over time. Stick to plain water, a diluted white vinegar solution, or a mild, toy-safe cleaner.
Q: How often should I change the water in the toy kitchen reservoir?
A: You should empty the water reservoir completely after every single play session. Never leave water standing in the reservoir overnight or between uses, as this is the primary cause of bacterial growth, mold, and odors.
Q: What if my toy kitchen’s pump stops working completely?
A: First, check the batteries if it’s battery-operated; replace them with fresh ones. Next, inspect the pump’s intake for any visible blockages and clear them. If these don’t work, the pump might be faulty and require replacement. Refer to the manufacturer’s guide or seek a suitable replacement part.
Q: Is it safe to use tap water in the toy kitchen?
A: Yes, tap water is generally safe to use. However, if you live in an area with hard water, consider using filtered or distilled water. Hard water can lead to mineral buildup (scale) in the pump and tubing, reducing the toy’s lifespan over time.
Q: How do I get rid of a persistent bad smell in the toy kitchen?
A: A persistent bad smell indicates bacterial or mold growth. You’ll need to perform a thorough deep clean, disassembling the water system, soaking components in a strong white vinegar solution, scrubbing thoroughly, and rinsing extensively. Allowing parts to air dry completely, ideally in sunlight, can also help eliminate lingering odors.
**Q: